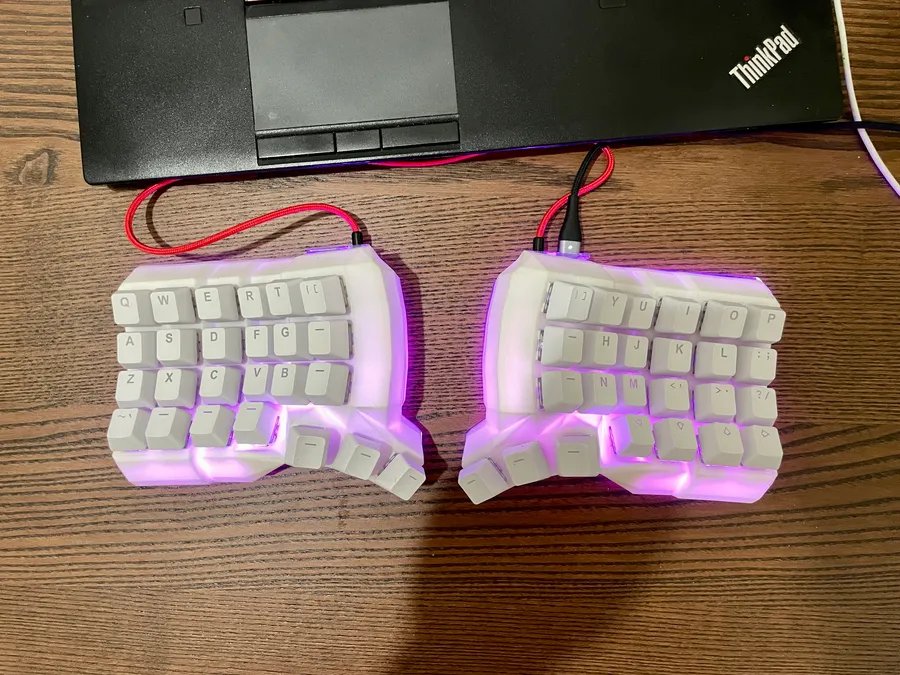
My keyboard journey
05/06/2024
My end-game (at least I hope) keyboard
Keebs path
Sometimes I think about the long journey I've made with keebs. In childhood, I had decent membrane keyboards, most of which had an ergonomic profile like the MS. Not sure if it somehow affected my taste because I started my career with the simplest, cheapest board and typed countless lines of code on such keebs. Then I heard about clickity-clack mechanical keyboards and decided to try one. It was a simple Chinese keeb with a thick metal body, double-shot caps, and Cherry Brown switches. A decent thing to annoy everyone around you. I think this purchase marked my dive into mech keebs I'm not a geeky aficionado who thinks you can fix everything with a new keyboard, but I built a couple of them. I hope I've finally built the last one for quite some time.
Dactyl manuform
Almost all of the time, I struggle with my maximalism. So I decided to build the ultimate mechanical ergonomic split keyboard and chose the Dactyl Manuform. Sounds like a crazy idea. Zero experience with QMK, zero experience with hand-wired keyboards, and zero experience in 3D printing. The last problem was the easiest one; I just asked my friend to print the bodies from PETG polymer, and Bob's your uncle. I got two pieces of rough-layered plastic with all the support structures. God, it was a nightmare to clean these prints from supports and small artifacts, but I was happy.
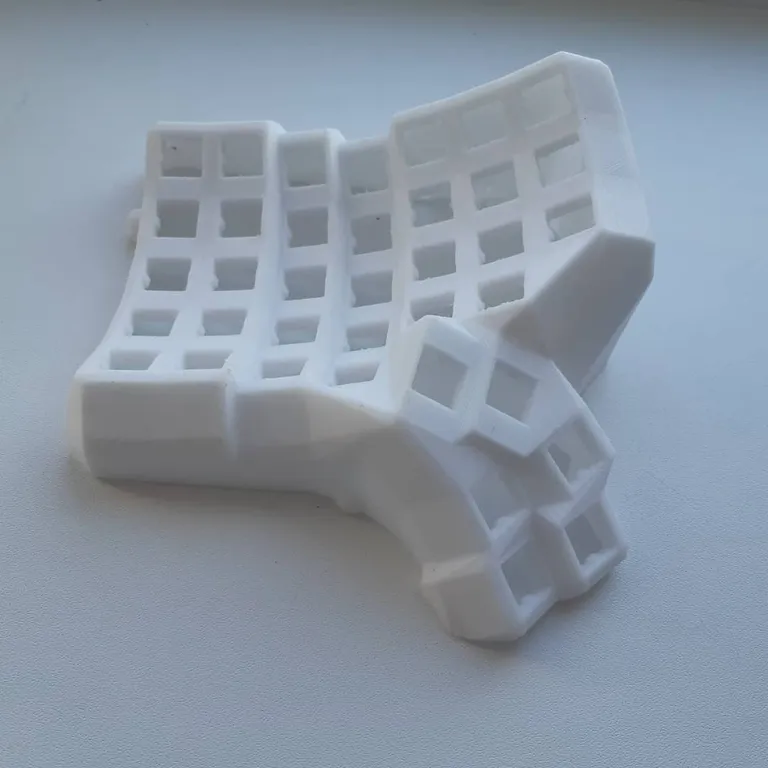
I ordered a set of Kailh Brown switches, cheap no-name DSA caps, two controllers, and a pile of diodes. Two evenings later, I built the hardware of my first keeb. It was ugly on both sides, but it was functional.
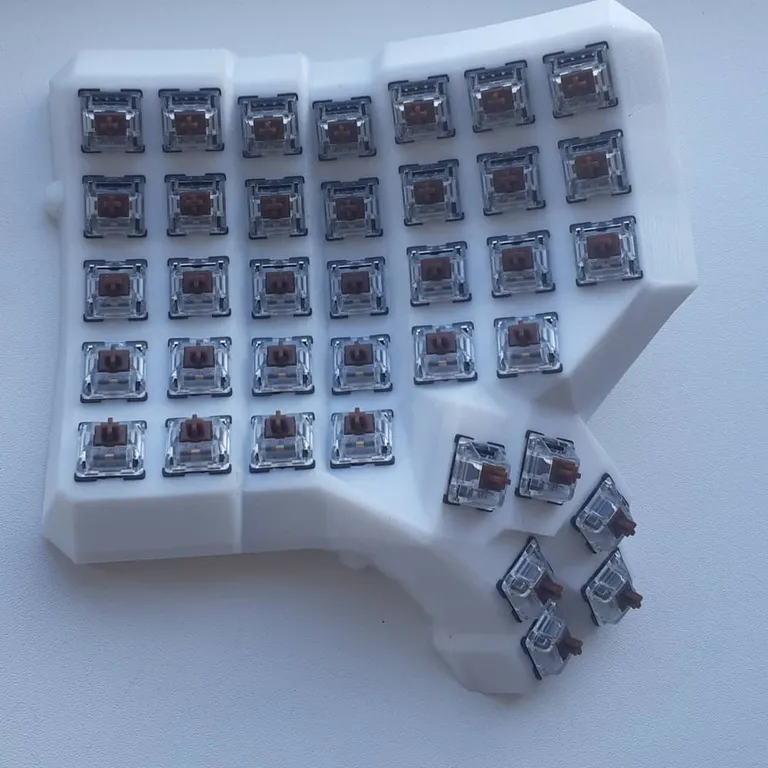
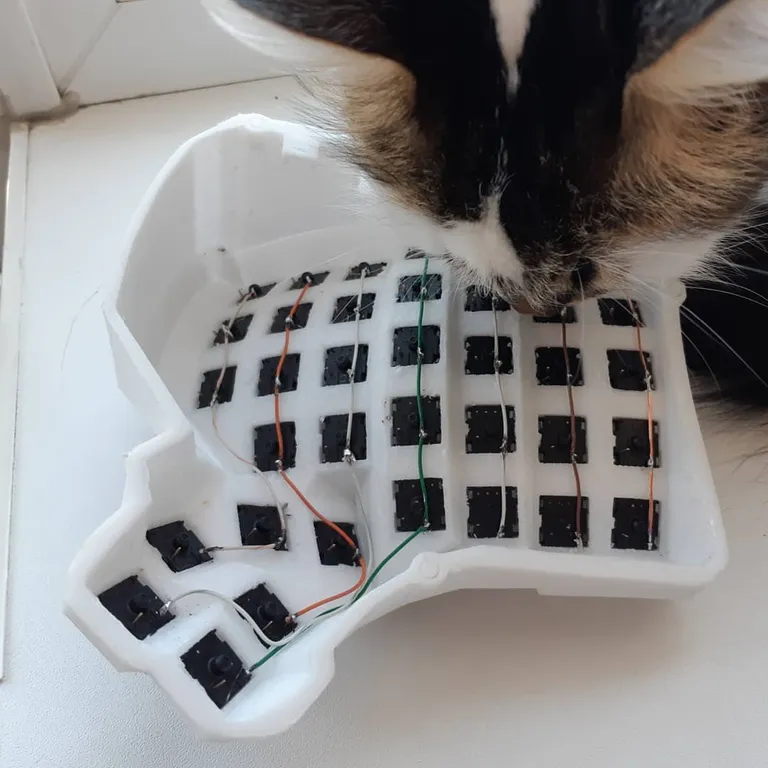
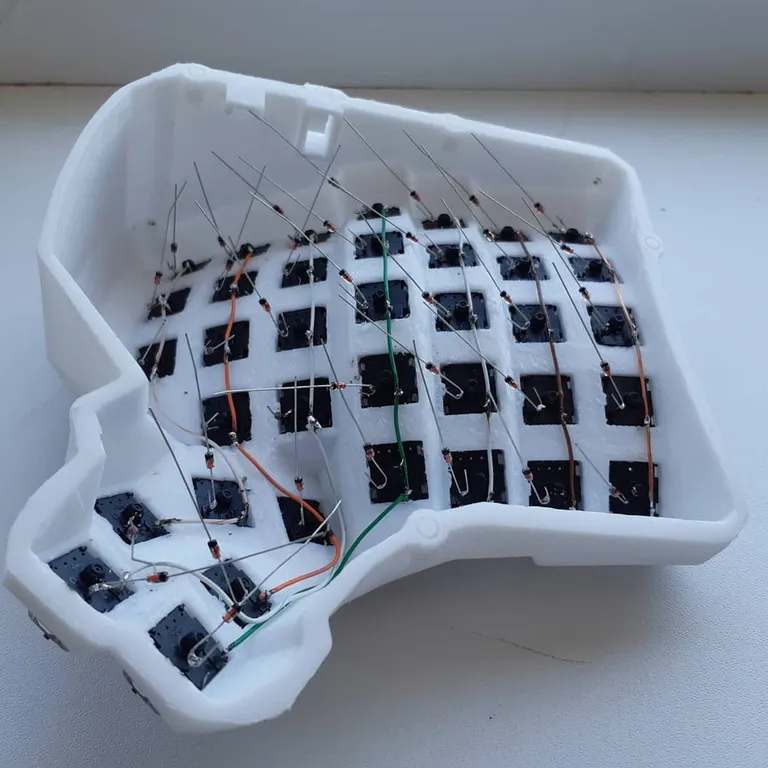
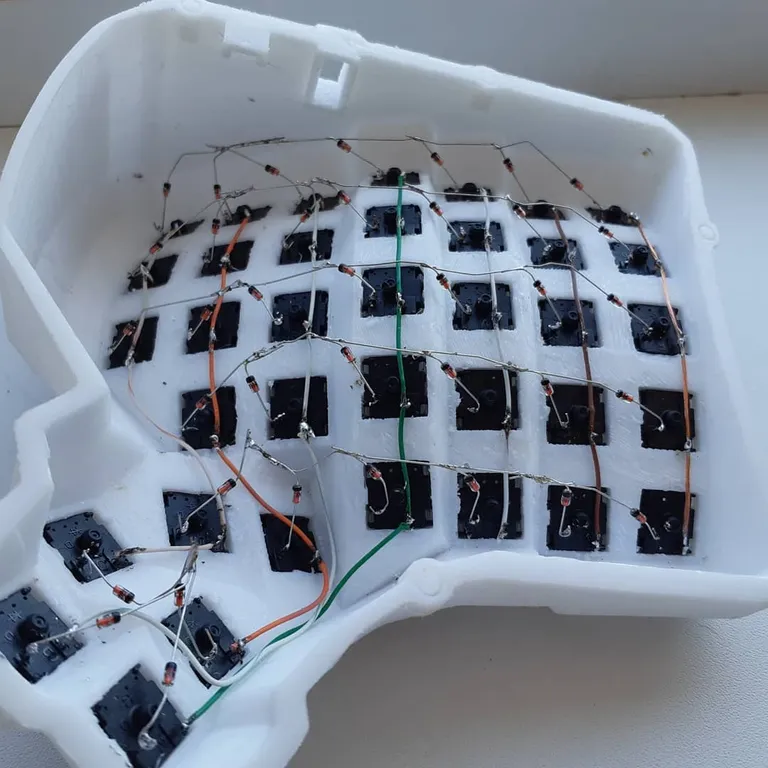
QMK wasn't a big issue either. It has decent docs and examples. The most complicated thing was the layout. I tuned it for a couple of months. It was still a mess, but an acceptable mess. That's how I got into keebs. To be honest, this keeb was ugly, and I decided that I wanted a beautiful factory-built one.
Moonlander
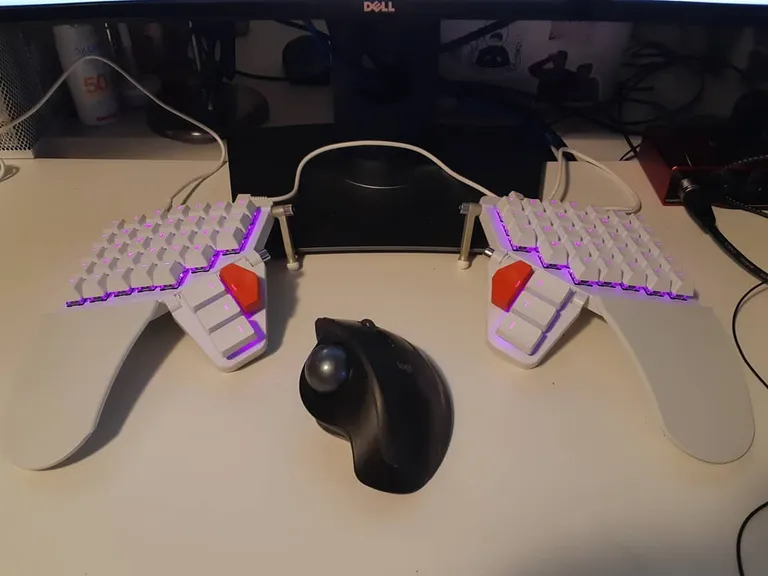
Nothing special. Ordered, paid, got it, tried it. Everything worked. Looked good. Happy year of typing. Bored. Annoyed. Too big and chunky. No concave. Quality not the best. Started planning the next one.
Custom Corne
This journey started with discovering the Jian keyboard. It is a niche keeb from the Ru community focused on full support of the whole Russian layout. It was originally created by KGOH. I missed the group buy and decided that I could easily patch a Corne board with two additional keys to mimic the Jian. Interesting journey. I learned how to use KiCad, and how to export gerbers.
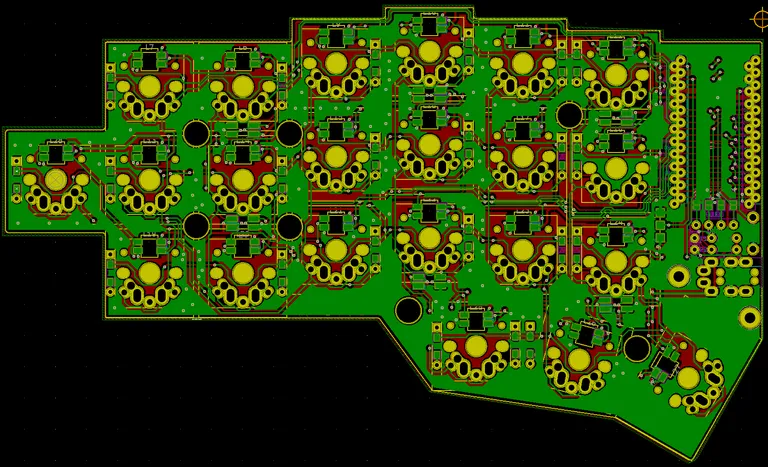
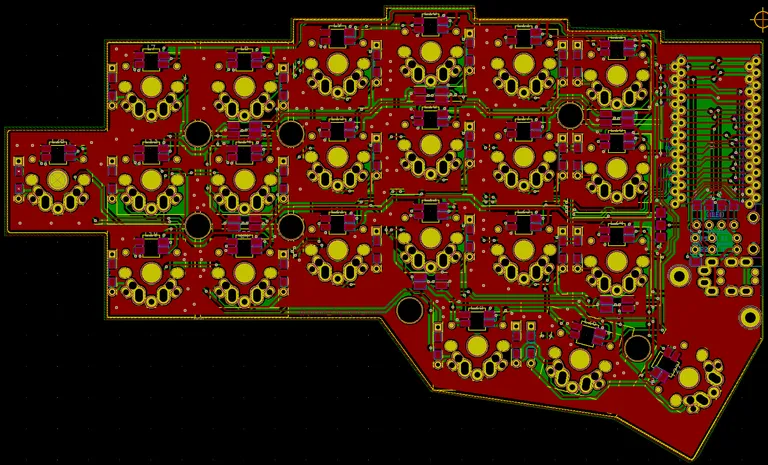
I've ordered PCBs at JLCPCB.
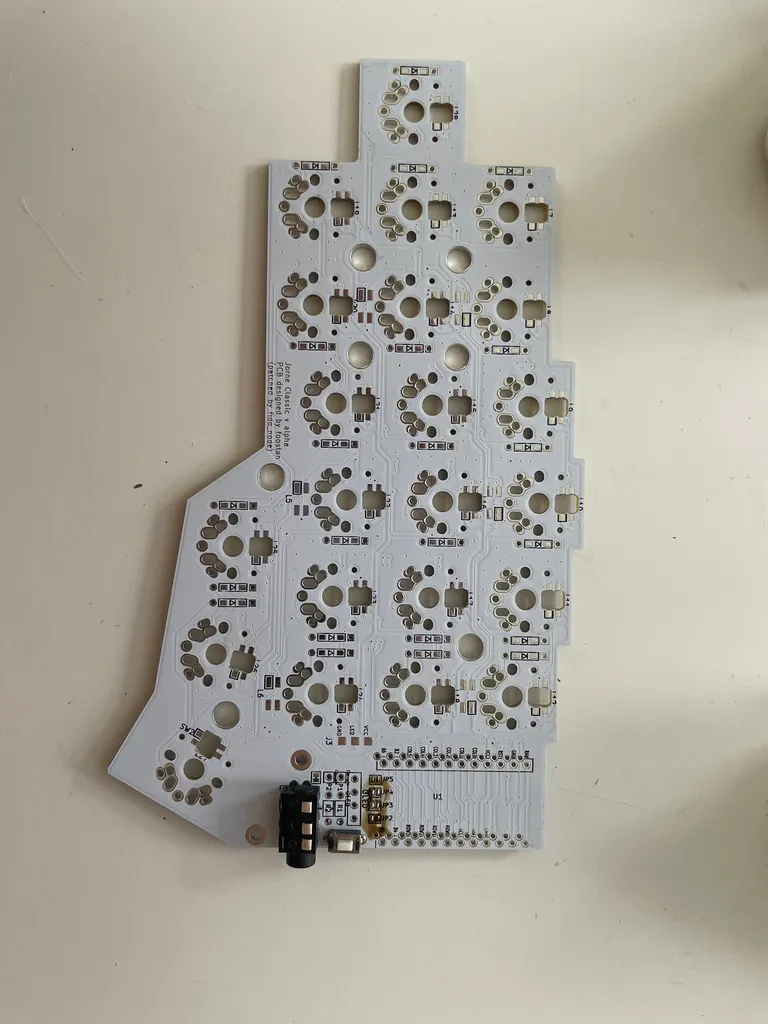
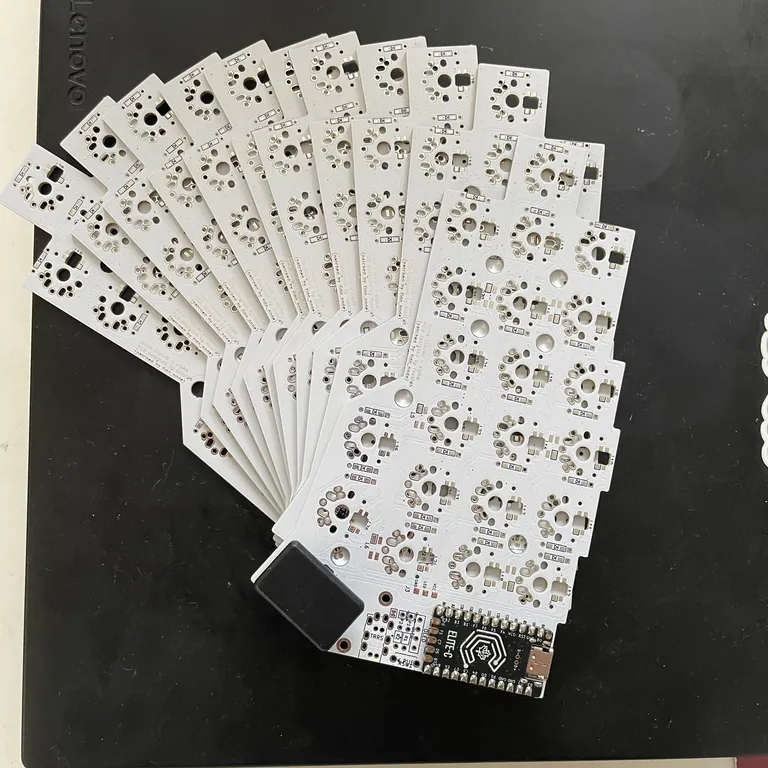
The build came out pretty decent. I was happy. RGB underglow. Low-profile switches. I think at this point, I found a way to make balanced builds.
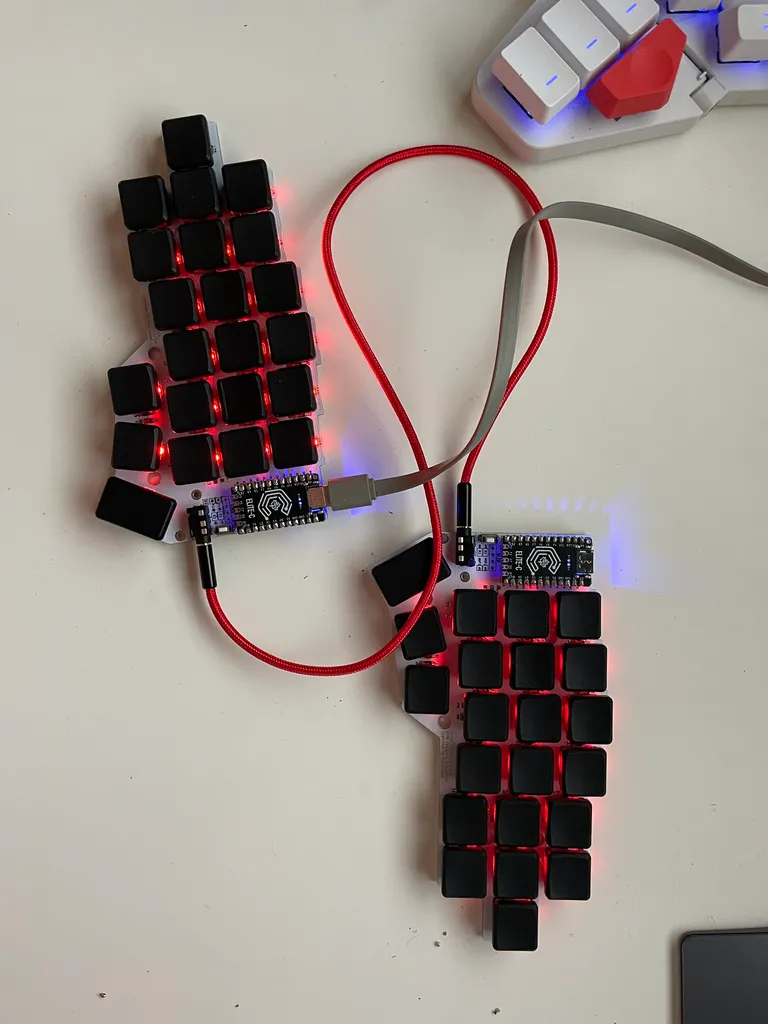
Daily driver for ~6 months. Then the world changed, and I decided to leave my home country and settle somewhere else.
Dactyl manuform again
Two years late I've settled down in new country and decide that I want to bring back my dactyl manuform experience.
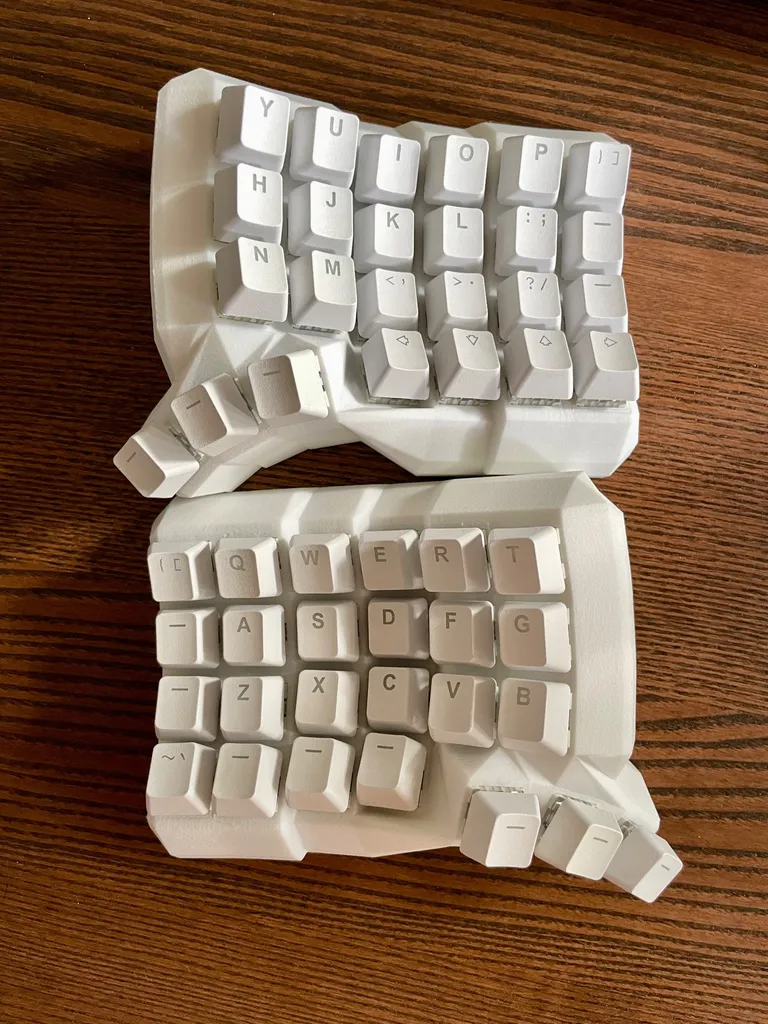
Hardware
Body
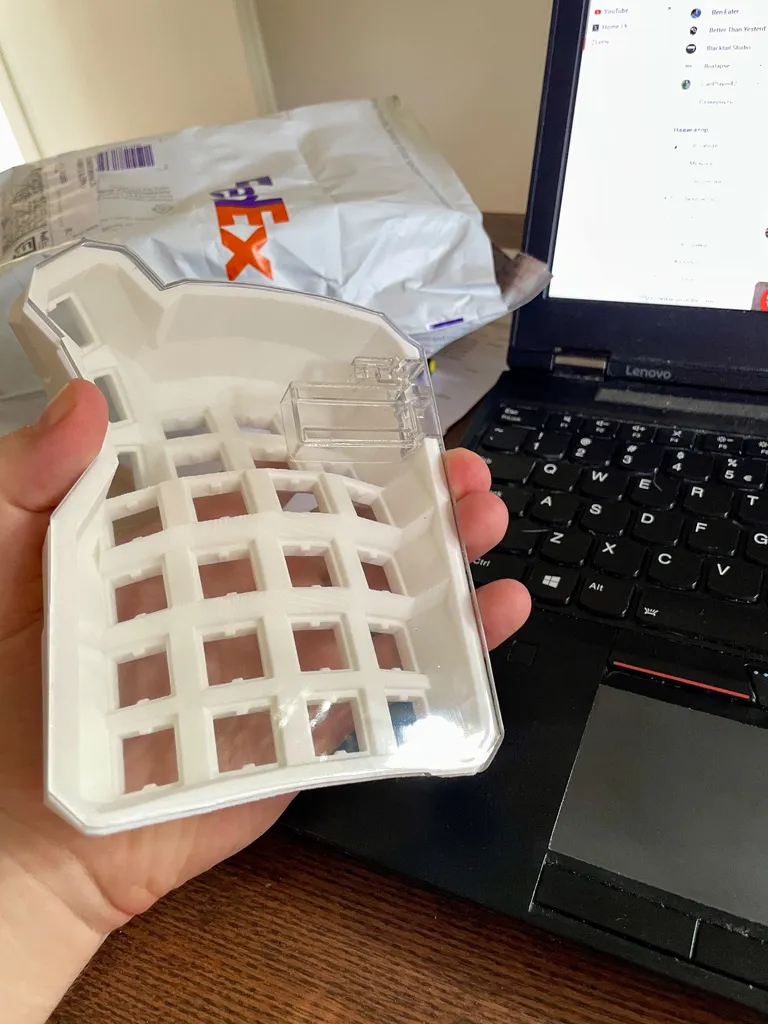
I've choose to use a Ryan's generator and generate body on top of Corne preset with all keys in last row and disabled stagger for the last two columns. Generator preset The body was printed by JLC3DP (JLCPCB printing department). I've choose SLS from nylon. Print has minor artifacts; I expected better quality.
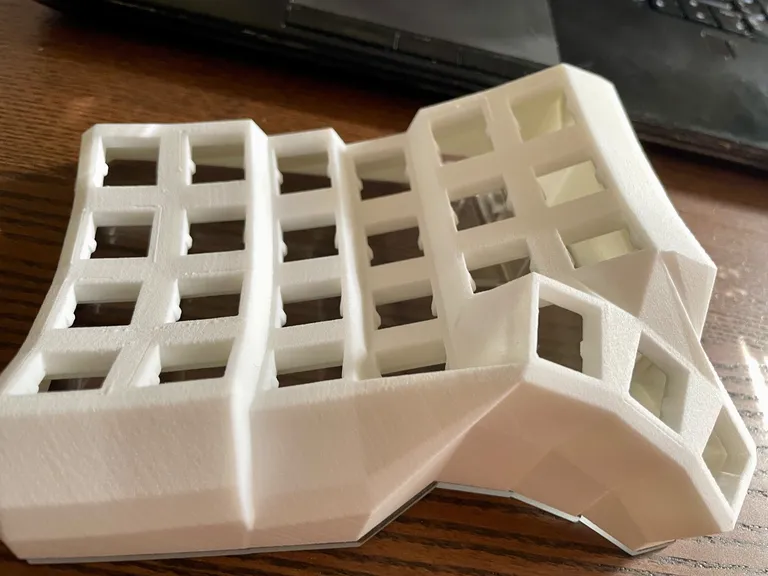
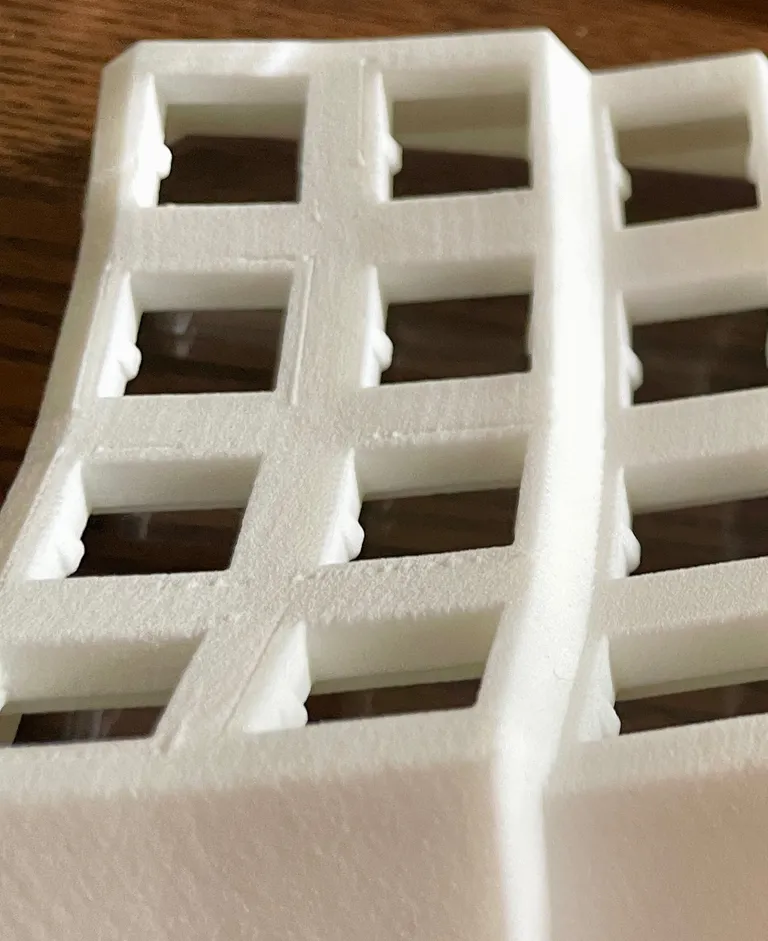
Overall, I'm happy with results. I also printed bottom plates and external holders for controllers and TRRS jack. They have been printed from resin with SLA. Looks neat.
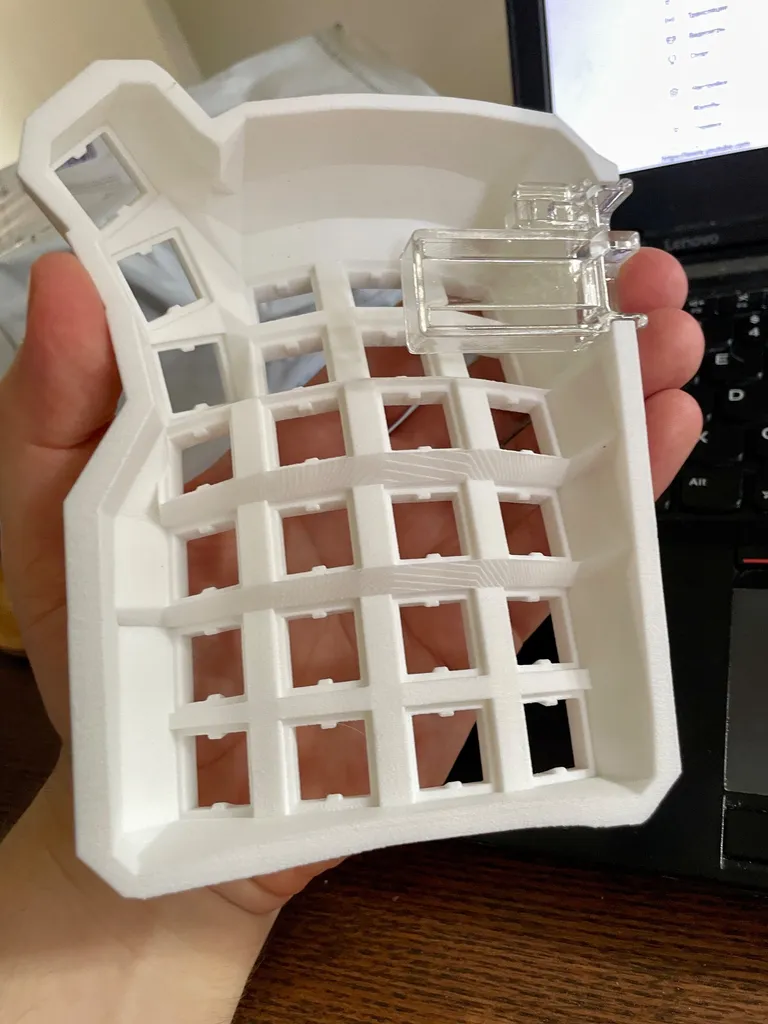
Switches and caps
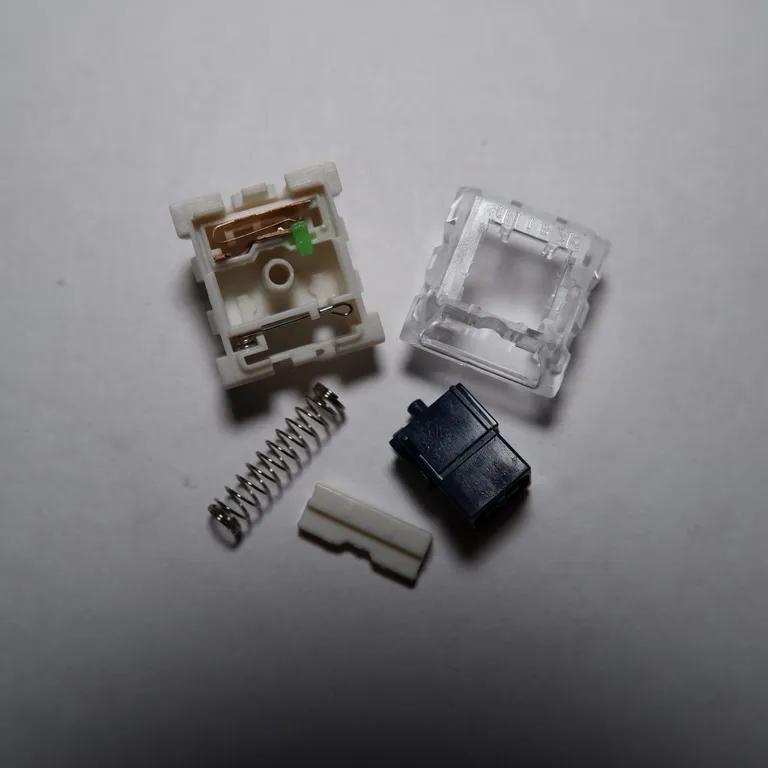
I've chosen Kailh BOX Navy switches. I really like the clickity-clack sound. They have a dedicated clickbar to produce this sound, and the box profile helps with moving down perpendicularly.
The caps are inherited from the Moonlander. They are thick, double-shot caps with a nice texture.
Controllers
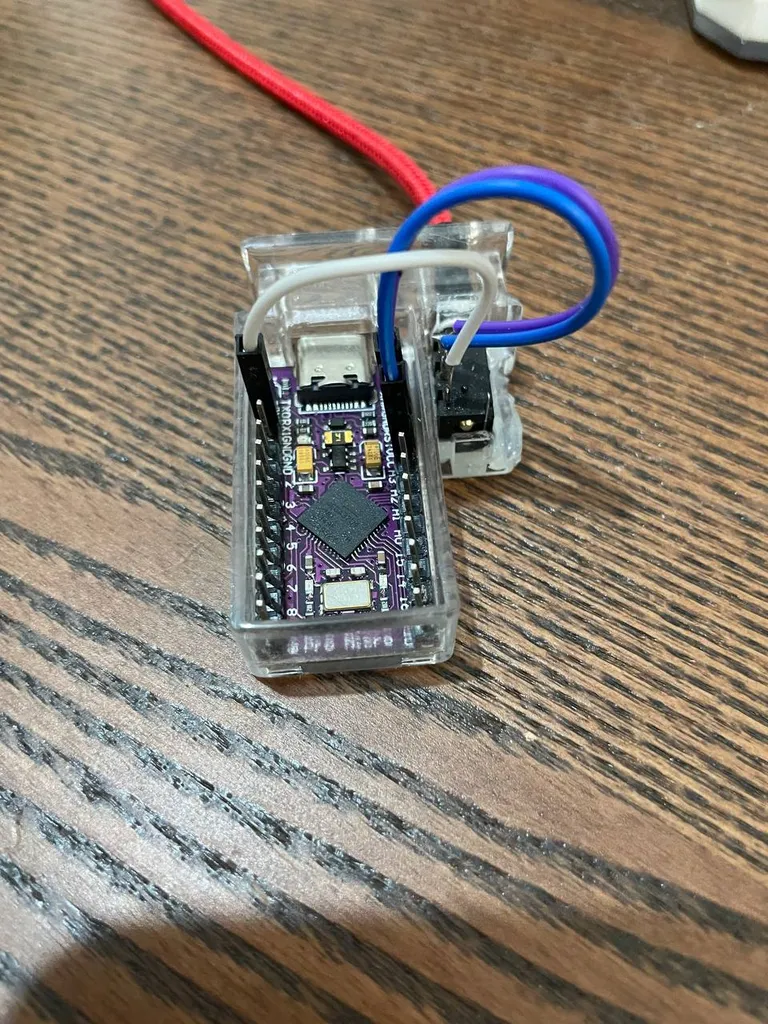
I used a bootleg Pro Micro called Tenstar Robot, based on the ATmega32u4. It's perfectly supported by QMK, pin-to-pin and size-compatible with the Pro Micro.
Amoeba things
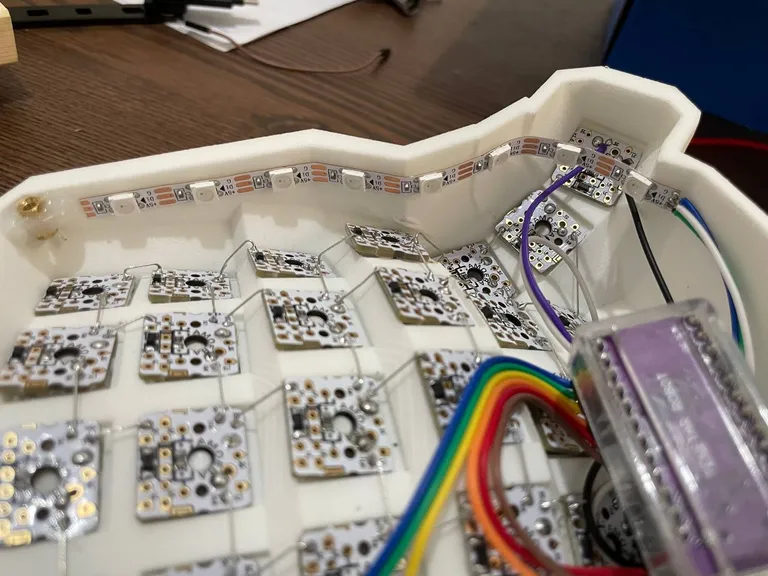
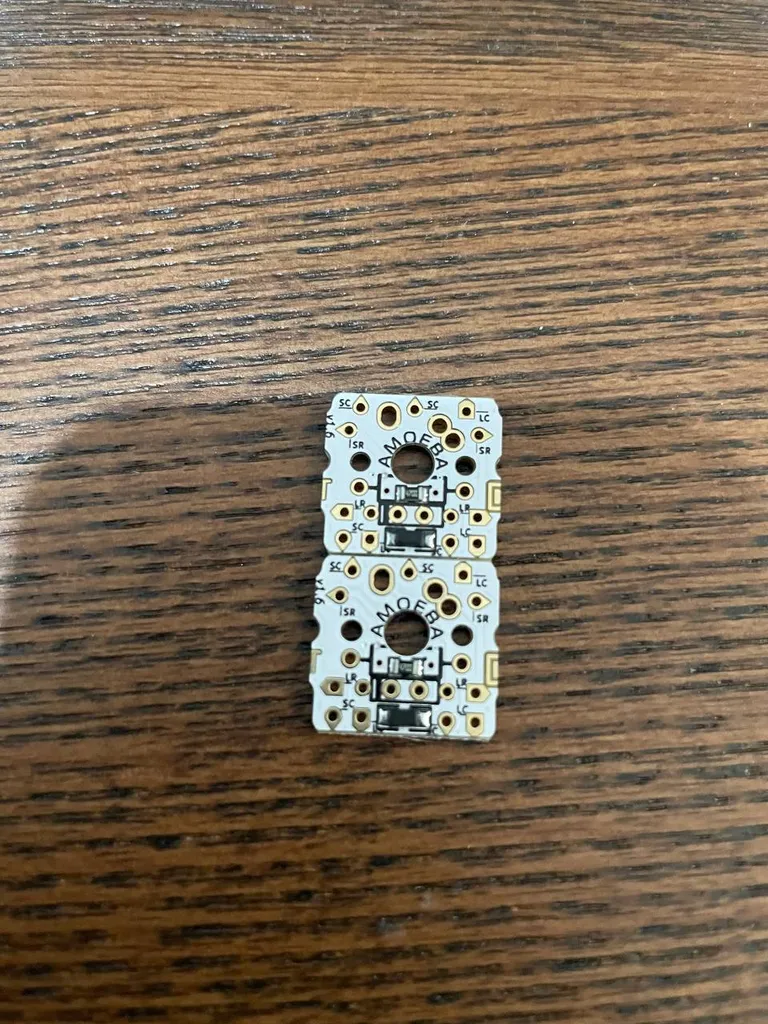
During this build, I decided that I did not want to make a big mess of wires and chose Amoeba single-switch PCBs.
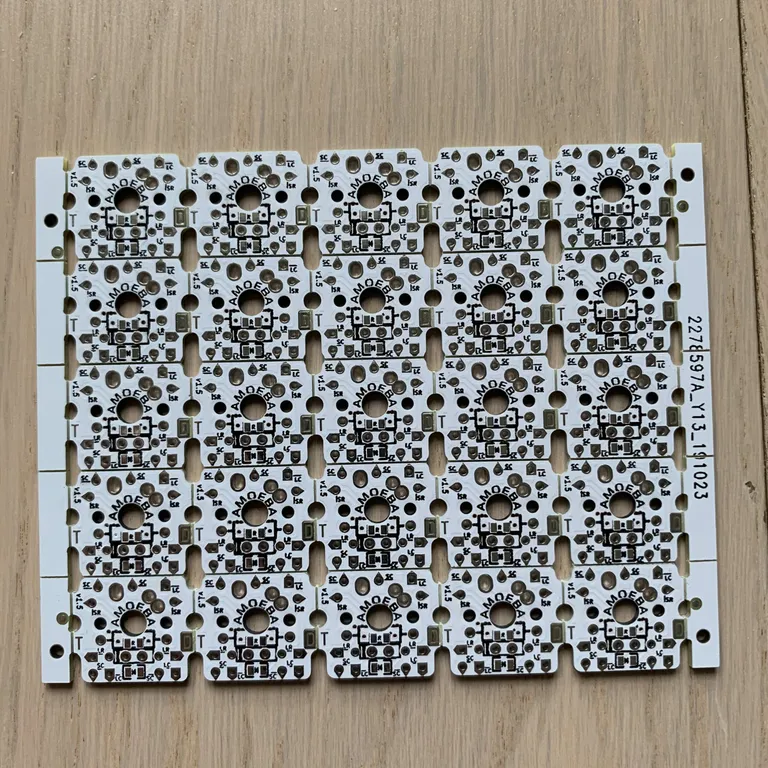
They are nice, have diodes on board, and simplify wiring. However, they have these flaps on the sides that do not match the places in the body. So, you need some elbow grease to grind them off.
Software
Plain default - QMK
Prerequiremets: QMK CLI
Clone QMK, setup QMK CLI.
git clone git@github.com:qmk/qmk_firmware.git
cd qmk_firmware
qmk setup -h ./
You may want to create a separate keyboard entry in QMK.
qmk new-keyboardMake own layout
I'll try to go through setting of my personal layout. It is based on Jian layout.
"features": {
    "rgb_matrix": false,
    "bootmagic": true,
    "command": false,
    "console": false,
    "extrakey": true,
    "mousekey": true,
    "nkro": true,
    "rgblight": true
},
Bootloader flashed to Pro Micro and target MC.
"bootloader": "caterina",
"processor": "atmega32u4",
Pins used to attach keyboard matrix.
"matrix_pins": {
    "cols": ["B5", "B4", "E6", "D7", "C6", "D4", "D0"],
    "rows": ["B1", "B3", "B2", "B6"]
},
RGB underglow configuration.
"ws2812": {
    "pin": "D3"
},
"rgblight": {
    "led_count": 16,
    "led_map": [7, 6, 5, 4, 3, 2, 1, 0, 8, 9, 10, 11, 12, 13, 14, 15],
    "animations": {
        "static_light": true,
        "breathing": true,
        "rainbow_mood": true,
        "snake": false
    },
    "layers": {
        "enabled": true,
        "blink": true
    },
    "default": {
        "animation": "rainbow_mood"
    },
    "split": true,
    "split_count": [8, 8]
}
Need to use another direction, since I use Amoeba pcbs turned 90 degrees.
"diode_direction": "ROW2COL",Turn on split feature, assign pin for halves communication, choose what to sync.
"split": {
    "enabled": true,
    "soft_serial_pin": "D2",
    "transport": {
        "protocol": "serial",
        "sync": {
            "layer_state": true,
            "indicators": true,
            "modifiers": true
        }
    }
},
This is the config.h file. Enables keeping handness information in
EEPROM of MC. You need to flash each half once with a special commands
to write EEPROM data. qmk flash -bl avrdude-split-right and
qmk flash -bl avrdude-split-left
#pragma once
#define EE_HANDS
This is the keymaps/default/keymap.c file.
    #include QMK_KEYBOARD_H

    #define _B 0
    #define _L 1
    #define _R 2
    #define _S 3

    const rgblight_segment_t PROGMEM system_layer[] = RGBLIGHT_LAYER_SEGMENTS({0, 4, HSV_RED},
                                                                              {12, 4, HSV_RED});

    const rgblight_segment_t PROGMEM lower_layer[] = RGBLIGHT_LAYER_SEGMENTS({5, 6, HSV_CYAN});
    const rgblight_segment_t PROGMEM raise_layer[] = RGBLIGHT_LAYER_SEGMENTS({5, 6, HSV_PURPLE});
    const rgblight_segment_t* const PROGMEM my_rgb_layers[] = RGBLIGHT_LAYERS_LIST(system_layer,
                                                                                   lower_layer,
                                                                                   raise_layer
    );

    void keyboard_post_init_user(void) {
        // Enable the LED layers
        rgblight_layers = my_rgb_layers;
    }

    layer_state_t layer_state_set_user(layer_state_t state) {
        rgblight_set_layer_state(1, layer_state_cmp(state, _L));
        rgblight_set_layer_state(2, layer_state_cmp(state, _R));
        rgblight_set_layer_state(0, layer_state_cmp(state, _S));
        return update_tri_layer_state(state, _L, _R, _S);
    }

    const uint16_t PROGMEM keymaps[][MATRIX_ROWS][MATRIX_COLS] = {
        // clang-format off
        [_B] = LAYOUT_split_4x7_3(
            KC_GRAVE,			KC_Q,		KC_W,	KC_E,			KC_R,				KC_T,														KC_Y,				KC_U,				KC_I,				KC_O,		KC_P,		KC_LEFT_BRACKET,
            KC_LCTL, 			KC_A,		KC_S,	KC_D,			KC_F,				KC_G,														KC_H,				KC_J,				KC_K,				KC_L,		KC_SCLN,	RCTL_T(KC_QUOTE),
            KC_LALT,			KC_Z,		KC_X,	KC_C,			KC_V,				KC_B,														KC_N,				KC_M,				KC_COMM,			KC_DOT,	KC_SLASH,	RALT_T(KC_BACKSLASH),
            KC_CAPS,			KC_NO,		KC_NO,	KC_LEFT_GUI,	LT(_R, KC_TAB),	LSFT_T(KC_SPC),	LT(_L, KC_ENT),	LSFT_T(KC_BSPC),	LT(_R, KC_DEL),	LGUI_T(KC_RCBR),	KC_D,		KC_E,  KC_F, 	LT(_L, KC_ESC)
        ),
        [_L] = LAYOUT_split_4x7_3(
            KC_UNDS, 			KC_F1,		KC_F2,	KC_F3,			KC_F4,				KC_F5,										KC_F6,			KC_F7,				KC_F8,				KC_F9,		KC_F10,	KC_F11,
            LCTL_T(KC_PLUS),	KC_EXLM,	KC_AT,	KC_HASH,		KC_DLR,			KC_PERC,									KC_CIRC,		KC_AMPR,			KC_ASTR,			KC_LPRN,	KC_RPRN,	RCTL_T(KC_KP_MINUS),
            LALT_T(KC_PEQL),	KC_1,		KC_2,	KC_3,			KC_4,				KC_5,										KC_6,			KC_7,				KC_8,				KC_9,		KC_0,		KC_RALT,
            KC_NO,				KC_NO,		KC_NO,	KC_LEFT_GUI,	KC_TRNS,			LSFT_T(KC_SPC),	KC_TRNS,			LSFT_T(KC_BSPC),	KC_TRNS,			LGUI_T(KC_F12),	KC_NO,		KC_NO,		KC_NO, KC_TRNS
        ),
        [_R] = LAYOUT_split_4x7_3(
            KC_NUM,			KC_PSLS,	KC_7,	KC_8,			KC_9,				KC_PMNS,									KC_VOLU,		KC_HOME,			KC_PSCR,			KC_PGUP,		KC_SCRL,	KC_CAPS,
            LCTL_T(KC_PEQL), 	KC_PAST,	KC_4,	KC_5,			KC_6,				KC_PPLS,									KC_MUTE,		KC_LEFT,			KC_UP,				KC_RIGHT,		KC_INS,	RCTL_T(KC_APP),
            KC_LALT,			KC_0,		KC_1,	KC_2,			KC_3,				KC_PDOT,									KC_VOLD,		KC_END,			KC_DOWN,			KC_PGDN,		KC_PAUS,	KC_RALT,
            KC_NO,				KC_NO,		KC_NO,	KC_LEFT_GUI,	KC_TRNS,			LSFT_T(KC_SPC),	KC_TRNS,			LSFT_T(KC_BSPC),	KC_TRNS,			KC_LGUI,			KC_NO,			KC_NO,		KC_NO, KC_TRNS
        ),
        [_S] = LAYOUT_split_4x7_3(
            DB_TOGG,			KC_NO,		KC_NO,	KC_NO,			KC_NO,		KC_NO,							KC_NO,	KC_NO,		KC_NO,		KC_NO,	KC_NO,	DB_TOGG,
            QK_BOOT,			KC_NO,		KC_NO,	KC_NO,			KC_NO,		KC_NO,							KC_NO,	KC_NO,		KC_NO,		KC_NO,	KC_NO,	QK_BOOT,
            RGB_MOD,			KC_NO,		KC_NO,	KC_NO,			KC_NO,		KC_NO,							KC_NO,	KC_NO,		KC_NO,		KC_NO,	KC_NO,	KC_NO,
            RGB_RMOD,			KC_NO,		KC_NO,	QK_RBT,		KC_TRNS,	KC_NO,	KC_TRNS,		KC_NO,	KC_TRNS,	QK_RBT,	KC_NO,	KC_NO,	KC_NO, KC_TRNS
        ),

        // clang-format on
    };